- To create classes for your institution, please navigate to the Classes menu selection.
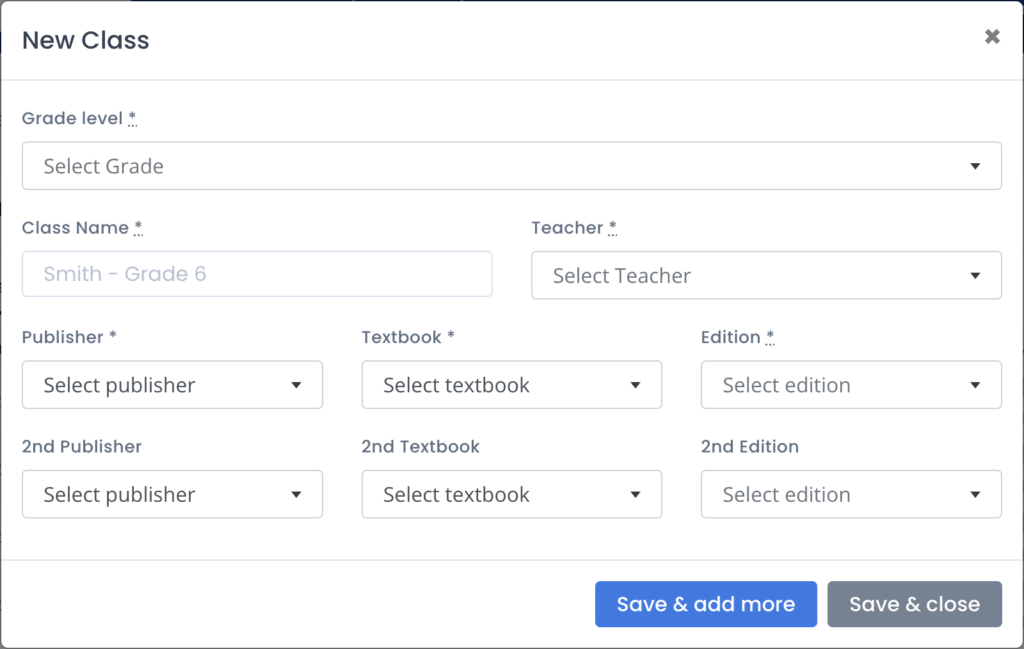
- Select the “New” button in the upper right corner of your screen. A window opens to prompt you for the relevant information. You will need the Religion Textbook Publisher, Series, and Edition used in the class.

- Select the Grade Level for the Class.
- Enter an identifiable name for the Class. NOTE: These Class names will be displayed on your and the teacher’s reporting dashboard so use something that is descriptive such that you know what it is.
- Select the teacher for this class. (As you had already created your Teachers in Step 4 above, this field will present a picklist of Teachers.)
- Enter the Textbook information for the Class from the drop-down list of Publishers, then Textbook Name, then Edition. For High School classes utilizing 2 Framework courses per year, enter the 2nd Textbook information, else leave blank.
- Click “Save & add more” and repeat steps 2-6 for as many classes as you need to create. Or click “Save & close” to save the class and return to the Classes menu.
Note: If your Testing Sections do not mirror your Classes, please see instructions to Add Testing Sections.

